Canned Responses for Gmail is a feature loved by over 80% of users as soon as they learn how to apply it daily in their routine. If you are a user who gets a lot of repetitive emails, daily and Canned responses are an excellent resource for those that continually get the same questions or comments via email. It is a good idea to set up Canned Templates once, as these help in saving time and improves your response time as you don’t have to prepare replies from scratch.

If you have not installed the Add on yet, then please Click here to install Canned Responses Ultimate Add-on from Google Marketplace
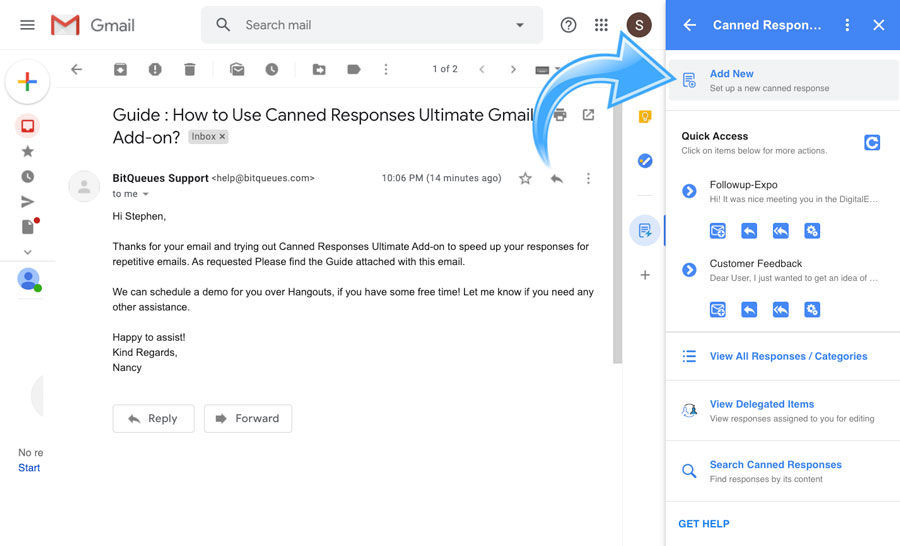
Open any email and access the Gmail G-Suite Add-on by clicking the icon for Canned Response Ultimate from the Right Side Bar in Gmail.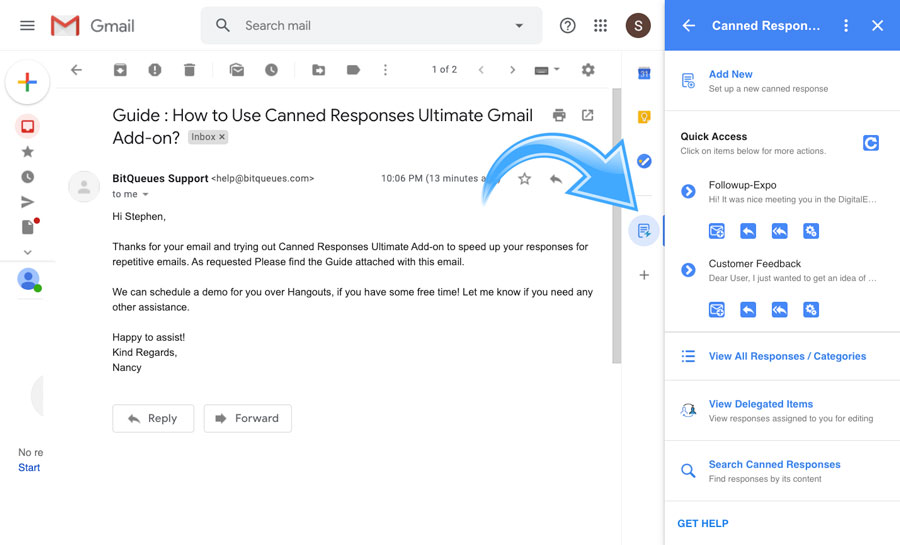
P.S: If you get this message,” Get started by opening an email or conversation” no need to worry. All you have to do is open any email message to access the Add-on interface. 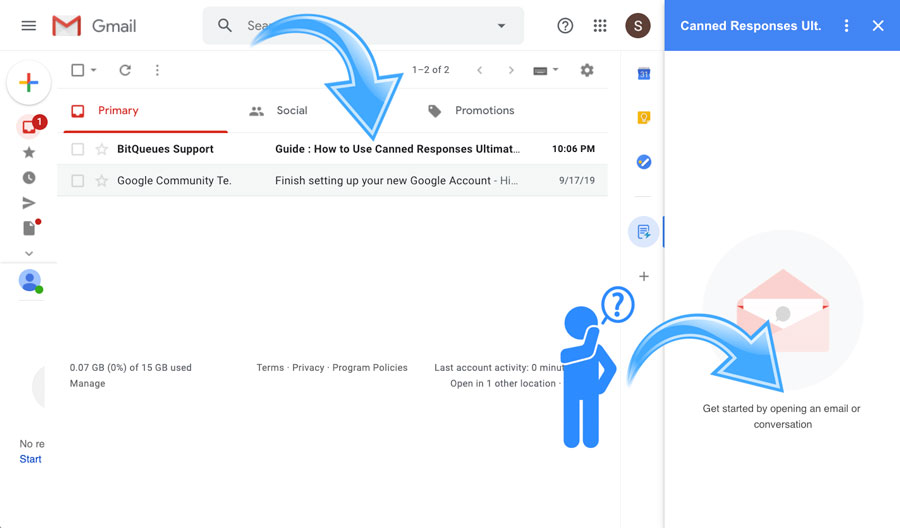
Please enter a response name to identify the response template while using it later easily. You may also choose to Assign the response to a Category for better organizing your canned responses. If you haven’t yet created a category, you may click the + button to add a new category.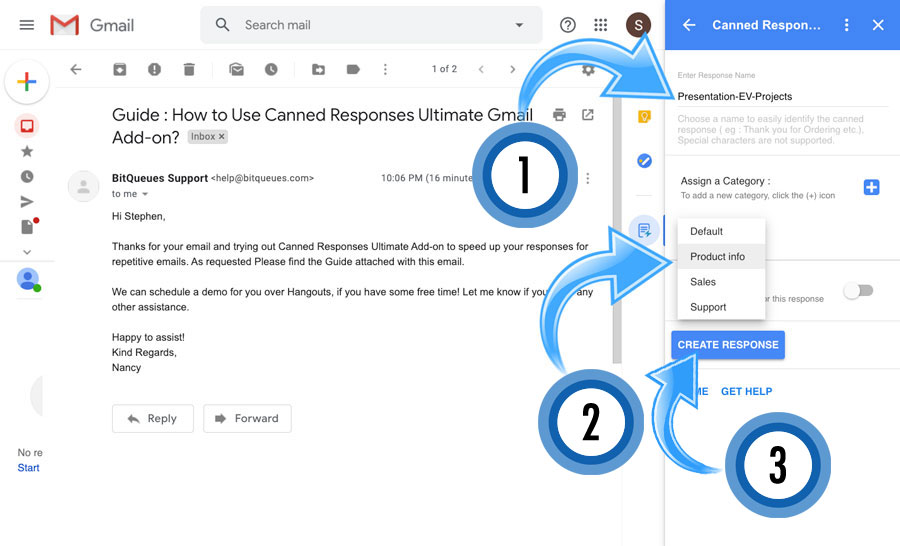
You will notice a toggle button that enables attachments for the canned response, which is by default set to disabled. If required, you may enable it by toggle, if you need to add attachments to this response.
You’ll notice the Canned Response Setup Wizard starts at step 1 and requests you to add content. Please click the Add Content button, and you’ll be presented with a Gmail Draft window to Add and format your mail template content. It’s the same as you usually do while writing emails. Please note copy-pasting HTML/ Rich text content is supported to make it easier and faster to set up professional-looking Gmail mail templates.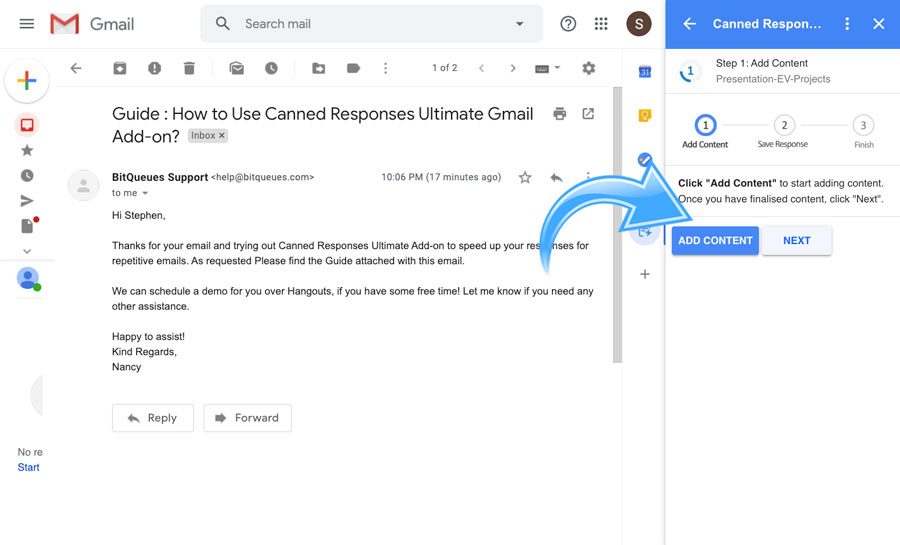
Once you have added and are satisfied with the mail content and ready to finalize it, click the Next button in the Add-on interface.
Note: If you, by chance, forget to Add content and directly click the next button. The Add-on is smart enough to remind you that you first need to Add-content.
Once the Draft has been saved, generally, you’ll notice a Draft Saved message appearing in the Draft title for few seconds. Now Click on the “Save Response” button on the Right Side Interface in Gmail. 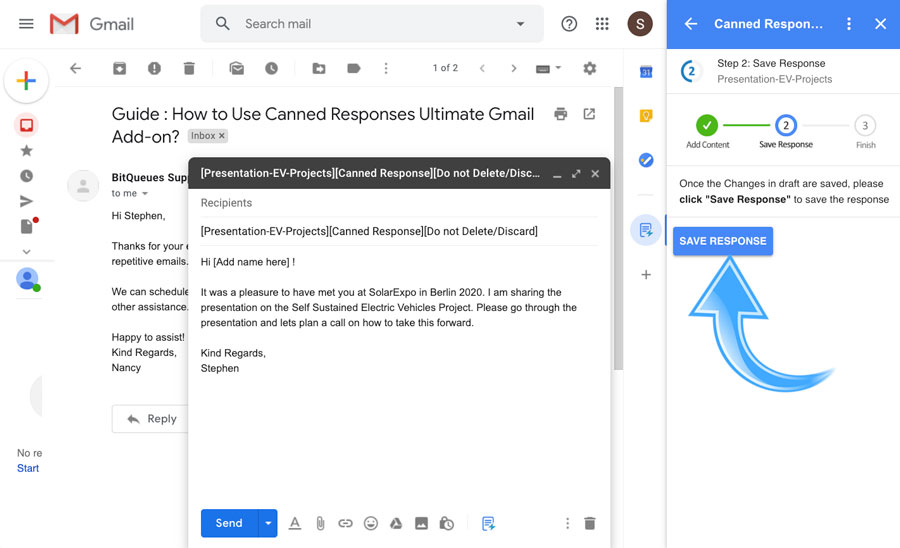
Please Note :
1. You might get an error if you have added attachments via Gmail Draft as Attachments need to be added via the Add-on interface.
2. Click on the X button on the top right side of the Draft window to close the draft window.
You may choose to Click the Finish button to return to the Home
screen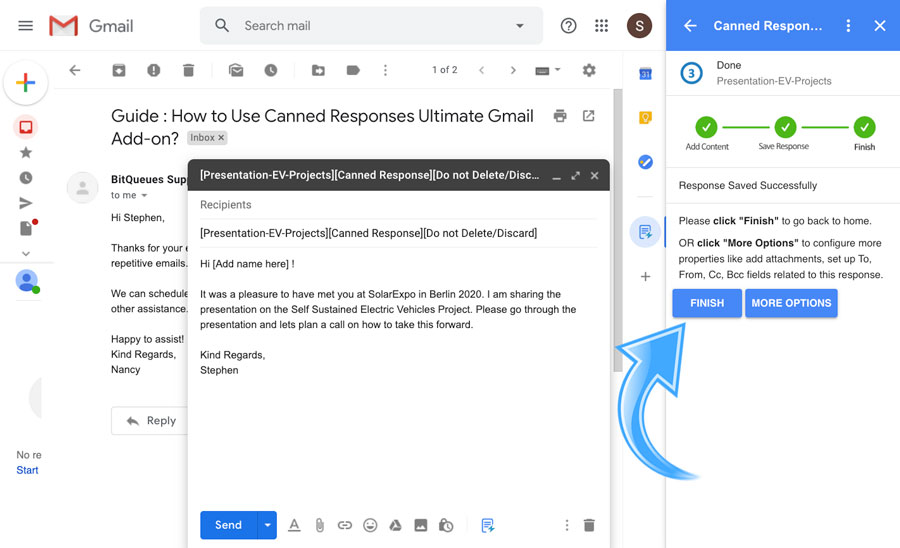
You may start using the Canned Template by accessing it under the Quick Access list on Home screen or Add another one.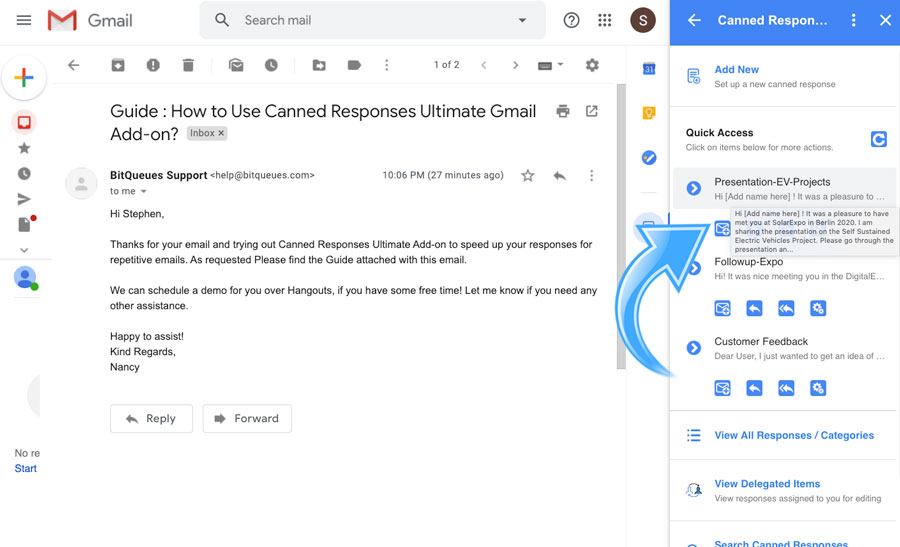
You may Click more options if you would like to set up additional properties related to this canned response template.
a) You may Set Custom subject for the canned response, which auto-populates while you use the template for sending emails.
b) You may Set From field to Auto populate email addresses from which to send the email while using this template. Very helpful for users who have set up alias or add-on accounts in Gmail.
c) You may Set Cc / Bcc fields to Auto populate email addresses you want be Cc/Bcc’ed when the template is used.
d) You may Set To field to Auto populate email addresses you want to send emails to while responding using this template.
e) You may Rename the Canned Response Template if you want to make any changes or Move /reassign the template to a different category.