Looking for a way to set Out of office Responses in Gmail that turn on and off automatically on specific days and after office hours? Auto Reply Pro Add-on for Gmail makes life simpler and productive for Gmail and Gsuite users by allowing users to get it done in few simple clicks!
In the Tutorial below we will guide you about how to set Out of office responders in Gmail that turn on/off automatically on specific days and during specified after office hours.
If you have not installed the Add on yet, then please Click here to install Auto Reply Pro Add-on from Google Marketplace
Need help with How to install the Add-on please click here to read installation tutorial.
a) Click the calendar icon from the right side bar in Gmail interface. 
b) Click the Open in new Tab icon on the top right in calendar side bar interface.
c) Click the plus icon next to other calendars to create and add a new calendar to use as a reference for the Add-on in later step.
d) Click the Create New Calendar option from the menu. 
e) We will name the calendar “Automate Out of office” for easy identification.
P.S. You can also set a specific time zone, it helps if you would wish to create two seperate calendars for the Auto Reply rules which follow different timezones. 
f) Next we need to create an event or multiple events covering the hours on specific days when the Out of office responses need to be active.
Example : we are creating an event Starting Saturday, 5.00 PM and ending on Monday 9.00 AM. We can set it to repeat every weekday that way it spans over the entire year and we don’t have to create multiple events for every week in calendar. 
Once we have saved the calendar representing the hours as event which are after office hours on a daily basis. Now we will proceed to setting up the Automated Out Of Office Responder through the Gmail Add-on.
a) To get started with setting up auto response rules click the Add / Manage Rules button to open the Auto Reply App in Browser.
b) If you’re logged into multiple Google Accounts in same browser. To access Auto Reply App, please Log out log in to the account as a primary account in which the Add-on is installed and you wish to use. Alternatively, you may Log in to this Account in incognito window / private window in Browser.
c) Please allow pop-ups for Gmail in Browser. Please read Step 2 about how to allow pop-ups in Gmail.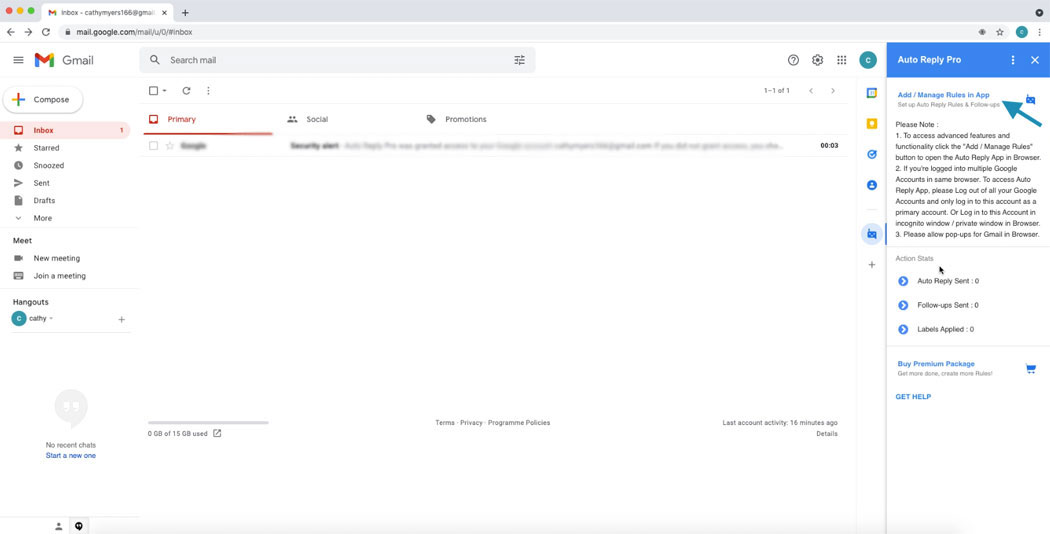
a) In case you notice a Pop up blocked notification, while trying to open dashboard from Gmail.
b) In the address bar, click Pop-up blocked see image below.
c) Click the link for the pop-up you want to see.
d) To always see pop-ups for the site, select Always allow pop-ups and redirects from [site] u003e Done.
Once you click Manage > Auto Reply > Add Out of Office, please type a name that helps identify this rule. As we plan to setup Automated Calendar based Out of office rule. So, we are giving this rule a name Automated-calendar-based-out-of-office, it will help us recall in future what this rule is about. Click next to move to the next step Set Conditions.
You can set multiple conditions which are listed in the section, you can create conditions based on the list or cover complex use cases by adding multiple conditions. If you wish an Out Of Office Response sent for every incoming email don’t set any conditions and proceed to next step.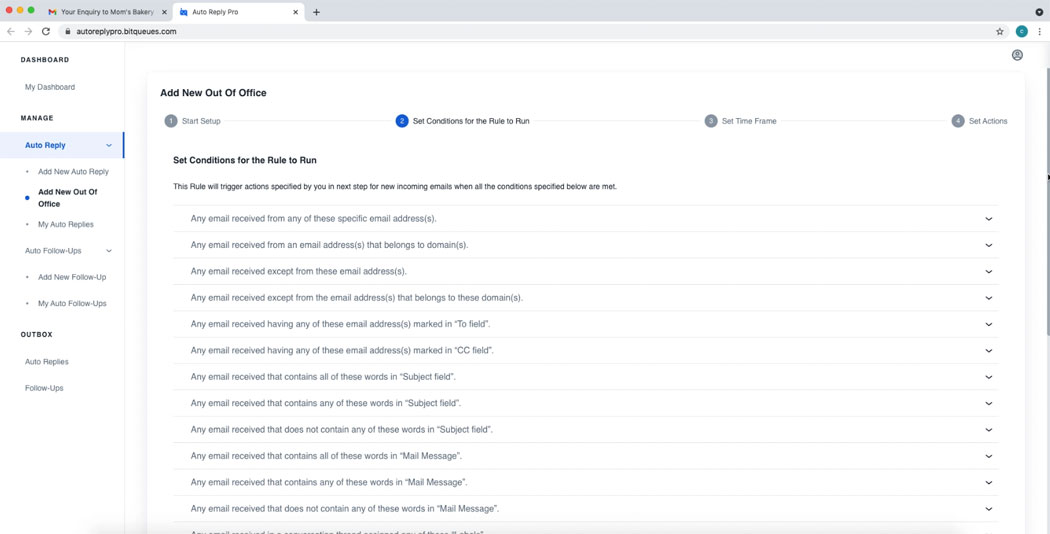
Worried for which all emails the Out Of Office Response will be triggered in case you have chosen to set some conditions. No need to worry, just click the Test Rule Conditions button. It will show you a preview from last few weeks emails for which the Out Of Office Response would have been sent. If all looks good proceed to next step to set time frame during which the Out Of Office responses will be automatically turned on and off. So, works perfectly in case you want Out Of Office Responses to trigger after office hours for your business.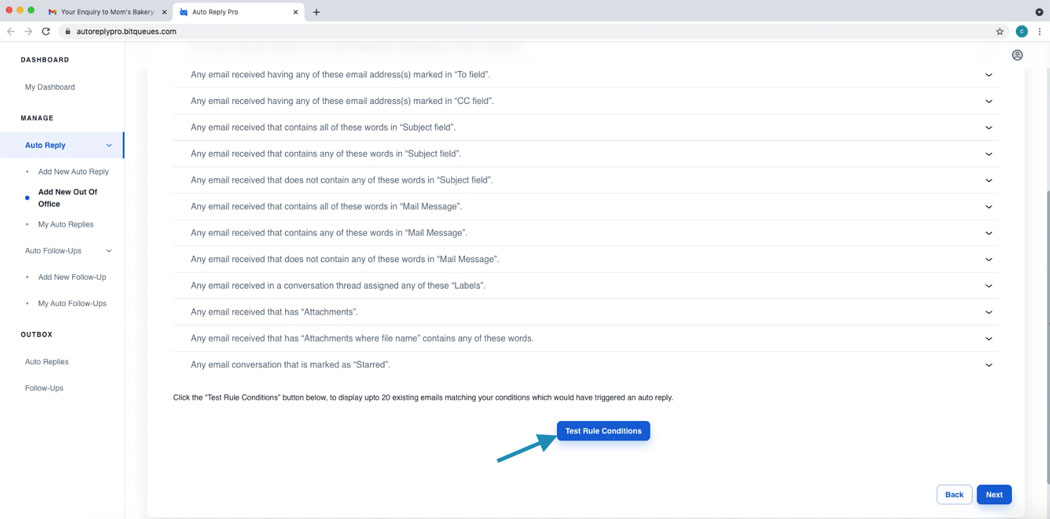
1) You can set the Out Of Office Response to enable Always or Enable on only Specific day and time .
2) You have more choices under Enable on only Specific day and time : Enable Daily or Enable for Calendar events.
3) For our use case we will choose Enable for Calendar events.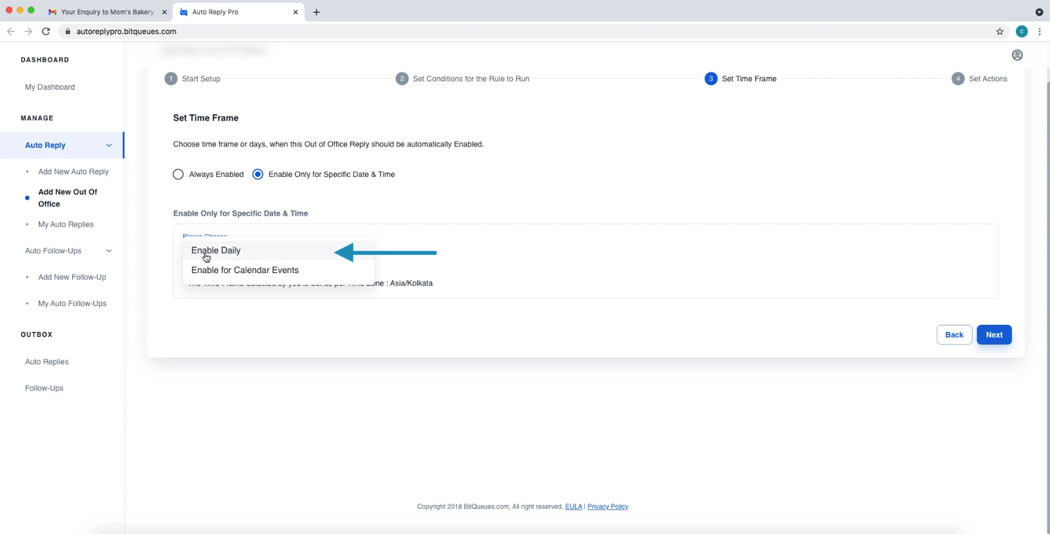
4) Next, we need to choose a calendar. We will choose the calendar we created specifically for Automated Out Of Office Responses “Automate Out Of Office” the calendar we created in our earlier steps.
You get a choice on how the Auto Response will be sent, will it be Reply to incoming emails or Create new email response.
In this use-case we are choosing the option to Create & Send New Email.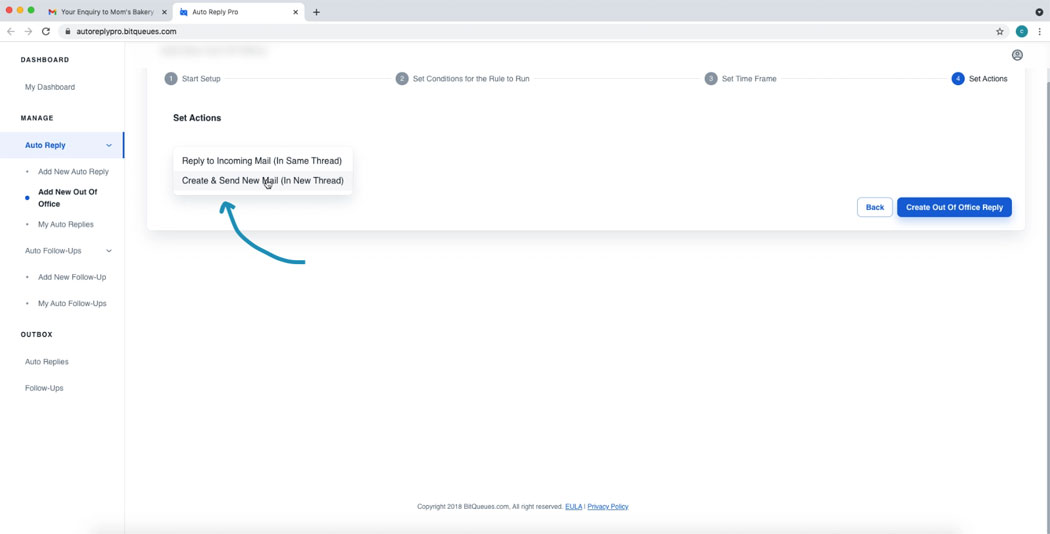
Now proceed to add the email content that you would like to be sent for incoming emails for your Out Of Office Response. 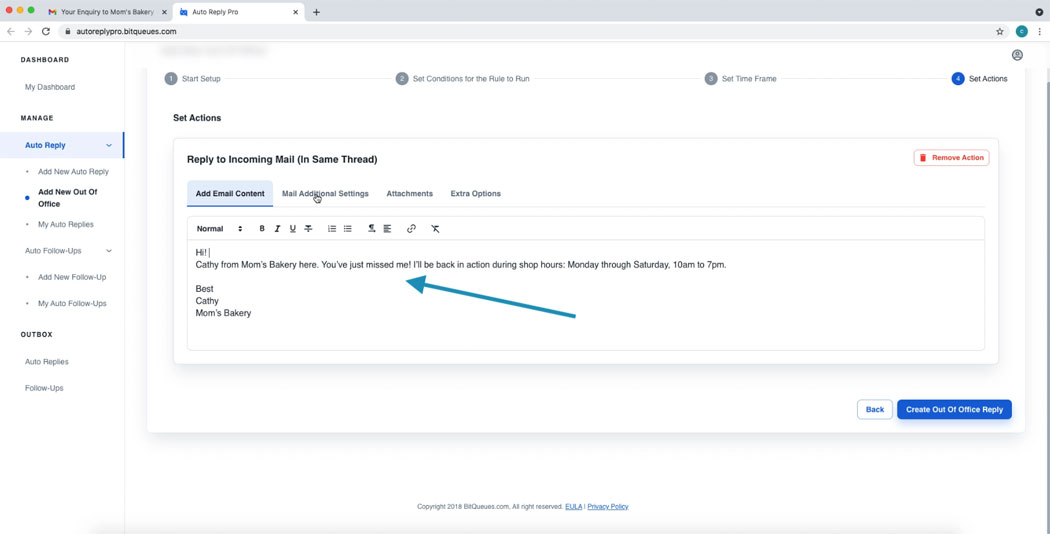
You have a choice to further customise the Out Of Office Response to set it to Reply to Sender or Reply to Email for incoming emails or to All the contacts who were in To, cc’ed on this email. 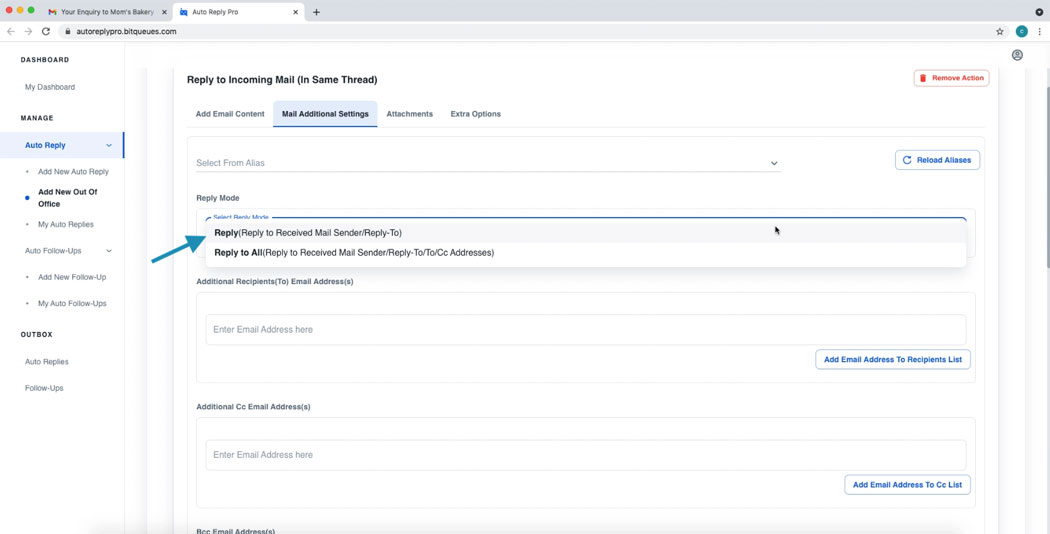
Or any email address in the emails body content like in case of Website form submissions.
You can also add Additional recipients by adding their email address as To, Cc, Bcc field.
Or you can remove specific email address or address belonging to specific domains in auto response, who were included in the incoming email.
You also have an option to set custom Reply to email address for Outgoing email response.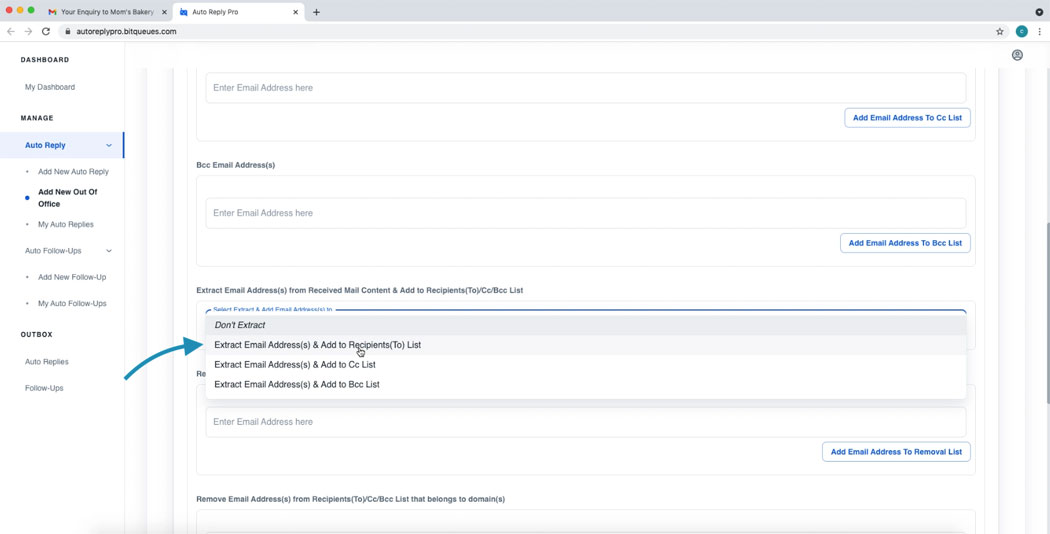
Auto Reply Pro allows you to add email attachments to your Auto Response Emails if required. Very helpful if you are looking to attach some Presentation, Brochure or Marketing materials along with your Email content.
– Attachments are Limited to max 10 files and overall size 10MB per email.
– All previously loaded attachments files are also available under your Attachment library, So, you don’t have to upload the attachments again and again.
To insert and upload a file from your device. Click on Insert from Computer Device Button. To access previously uploaded file click Insert from Attachment Library button and choose your file to attach from the list.
You may choose to set some extra options like adding a label to Auto Response emails for easy identification or to organise emails. If you haven’t created any labels yet, you can create in Gmail interface and click Reload labels button to choose from the list. 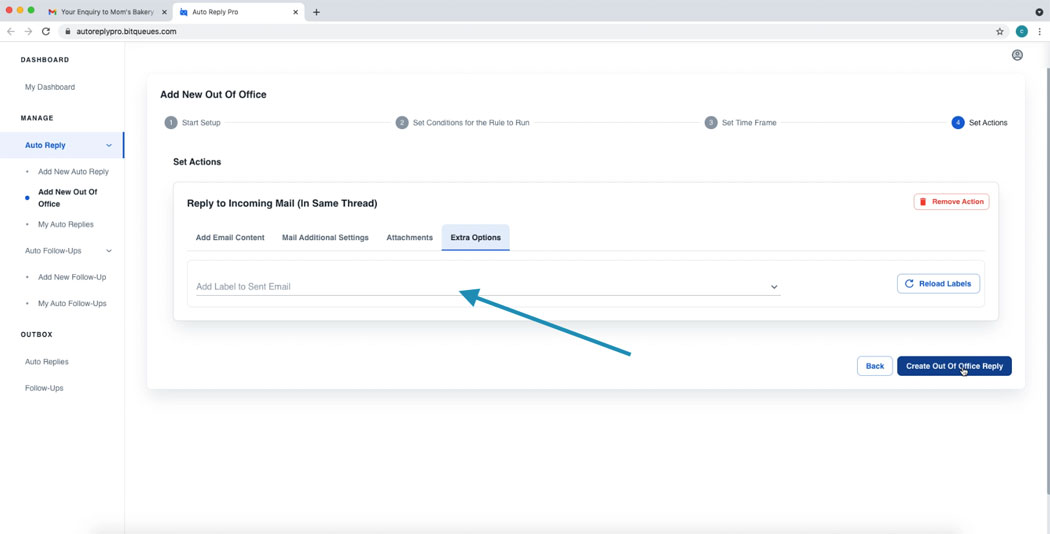
Click the Create Out Of Office Reply button and we are finished setting up our Auto Response with Attachments for Gmail. 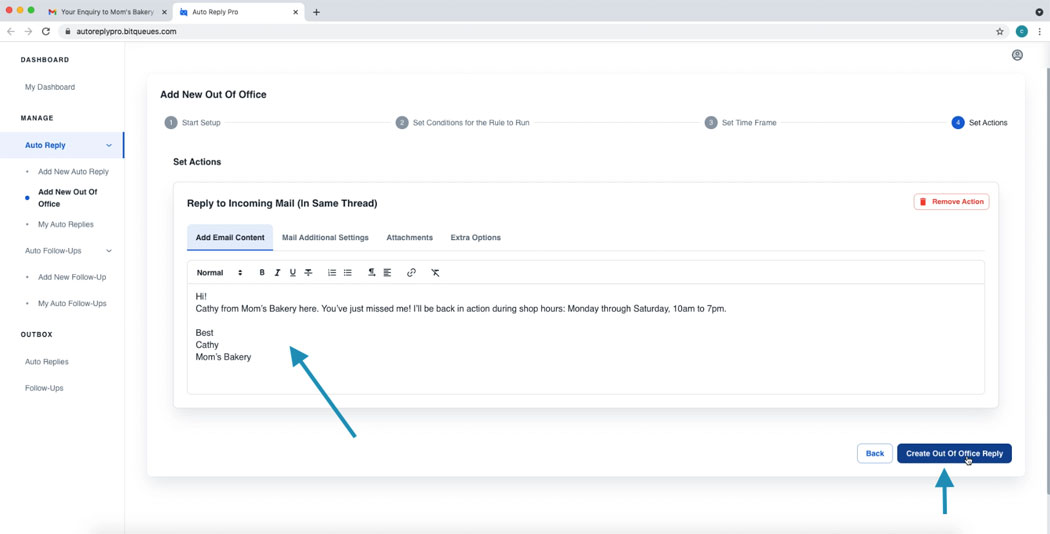
In case Creating a new email option is selected , you can specify custom email subject under Mail additional settings tab.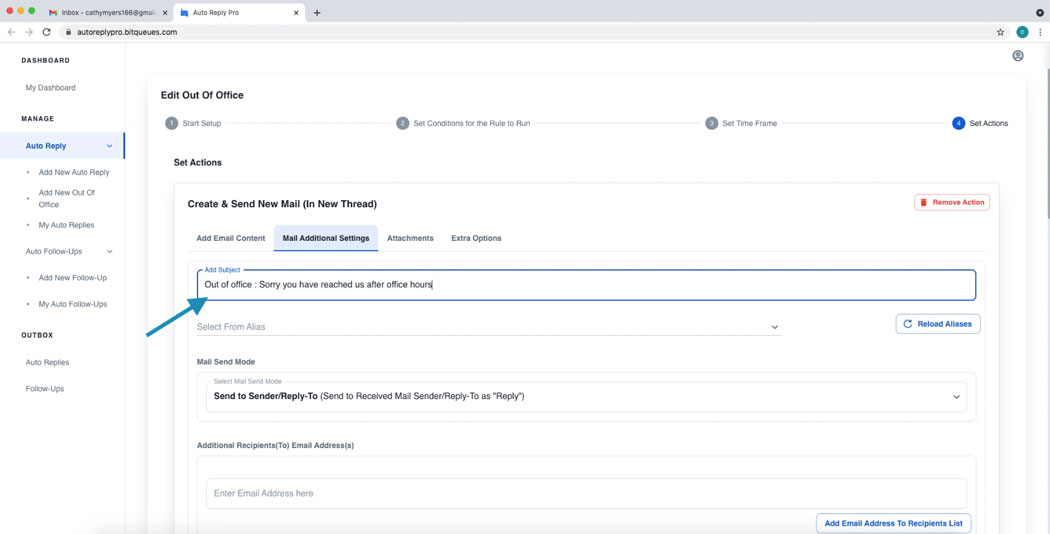
From the left side bar menu Please follow the path Auto Reply > My Auto Replies. This should list all the existing Auto Replies you have created and click the three dots icon on the right side next to Auto Reply name. You will get Edit / Remove / Change Order Priority options.
Auto Reply Pro lets you do more by helping you automate complex workflows. By adding more rules, which are executed in sequence. So, let’s say you have one rule set to respond to incoming emails with a standard Out Of Office Response.
You can set one more rule with an entirely different response may a relationship managers contact for customers who opted for Premium support or after office hours support by adding the email address or domain the email belongs to under conditions. However, do remember to move the more complex rule with conditions up in order. So, the complex rule is executed before the standard response.
By default Google allows you to send only one auto response per day to incoming emails from one contact. But Auto Reply Pro allows you to send multiple auto responses depending on the conditions set. Not just that you can set the Add-ons with different mail send modes ( Run and Send Auto Reply once for each matching rule per thread or for first matching rule per thread Or every time for all incoming mails per thread). Click here to learn more about Setting Mail Send Modes.
